*Notice: You can download the PDF version of this post*
Imagine you are doing geology surveys in the field, enjoying geology map services as powerful as Google Maps: locating yourself on the map, zooming in, zooming out, drawing lines to get the stratigraphic profile, marking down a sampling site, taking a selfie with your rock sample, searching for nearby geologists, making small talks online, sipping your ice cold beer (I'm kidding, no beer provided).
Well, this step-by-step post will walk you through making above imaginations come true.
Requirements
First you need a map scanner to digitize your geology maps.
You will need ArcGIS, QGIS or similar software to georeference your map and trim off overlapping edges.
You will need TileMill or Mapbox Studio to generate data for your geology map service, both offline and online.
Digitizing geology maps
It depends on where you get your geology maps and the scale of your maps. If you downloaded your maps as *.jpeg, *.png, *.bmp, etc., from the Internet, no bother scan your geology maps. If you bought or borrowed your paper maps, scan your maps, as the geology map of Sichuan Province's Dege County, China, shown bellow:
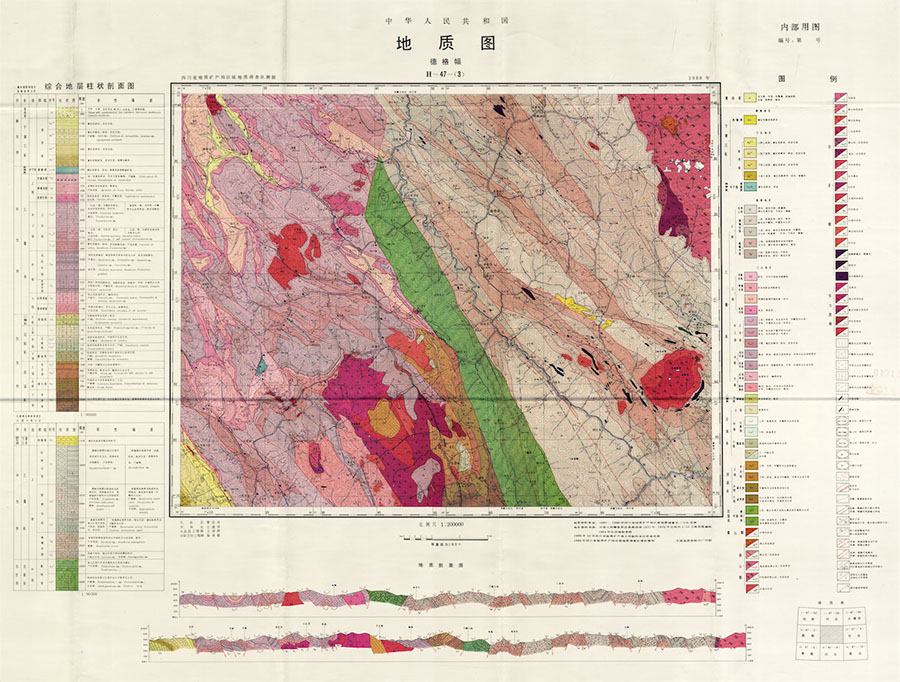 Figure 1. Geology map of Dege County, Sichuan Province, China.
Of course you can refine your scanned maps in GIS softwares, turn raster maps into vector maps, turn informations on the map into well-orgnized Geo-spatial Databases, on the database you can develop very high-level and powerful services. But that cost a lot of energy, and money if you are developing it for commercial use. I am positive it will be a good investment. Anyway, as I was not funded or encouraged, and I developed this for my own use, I left geology maps as rasters and moved to the next step.
Georeferencing maps and triming edges
Open ArcMap, add one piece of geology map, notice that normally you will find points at four corners where you can read their \(<\)longitude, latitude\(>\). Select the tool in georeferencing toolbar highlighed with red frame in Fig 2, left click on one of the \(<\)longitude, latitude\(>\) known points, then right click on it, select "Input X and Y", then enter its \(<\)longitude, latitude\(>\). After processing all points with above procedures, click georeferencing\(\rightarrow\)Update Georeferencing.
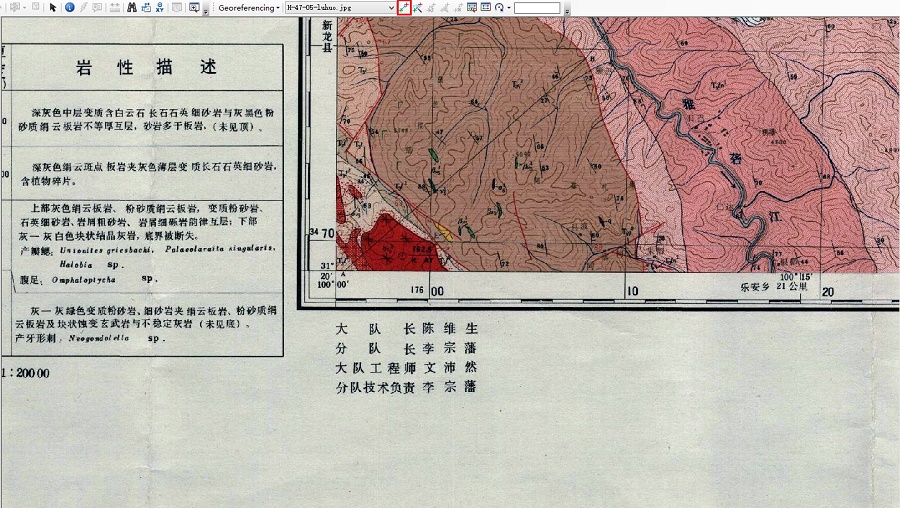 Figure 2. Procedure of georeferencing geology maps.
Adjacent geology maps' edges will overlap after georeferencing (Fig 3).
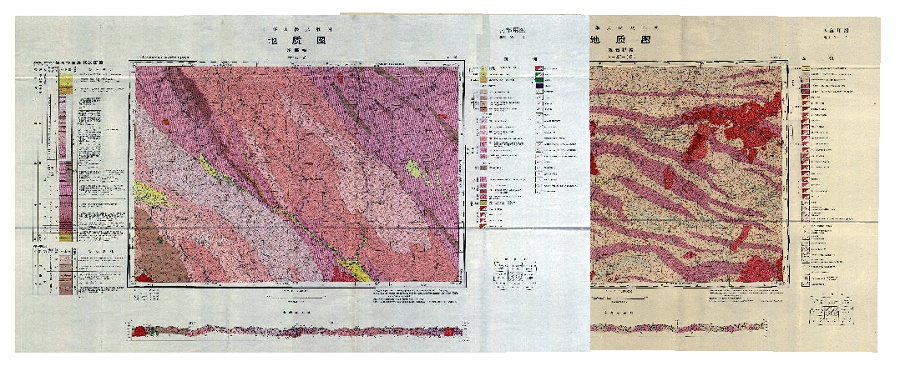 Figure 3. Overlapping edges of adjacent geology maps.
Edges should be trimed off when mosaicing these maps together.
Create new polygon shapefile and add it in, sketch a polygon that just covers the mapping boundary of the geology map. Use this polygon clip the raster map: ArcToolbox\(\rightarrow\)Data Management Tools\(\rightarrow\)Raster\(\rightarrow\)Raster Processing\(\rightarrow\)Clip.
Define projection of the cliped map: ArcToolbox\(\rightarrow\)Data Management Tools\(\rightarrow\)Projections and Tranformations\(\rightarrow\)Define Projection. Define it as "WGS 1984 UTM Zone xx", according to its zone number.
Save the cliped and projection defined map as *.tif: ArcToolbox\(\rightarrow\)Data Management Tools\(\rightarrow\)Raster\(\rightarrow\)Raster Dataset\(\rightarrow\)Copy Raster. Include .tif as the extension of your output file.
The final result so far looks like Fig 4.
 Figure 4. Overlapping edges were trimed off.
Importing geology maps to TileMill (or MapBox Studio)
Import saved geotiff maps into TileMill: open TileMill, new Project and name it, click the tool highlighted with red frame in Fig 5, click add layer, browse and select geotiff maps, "SRS" select "WGS84", click "Save&Style".
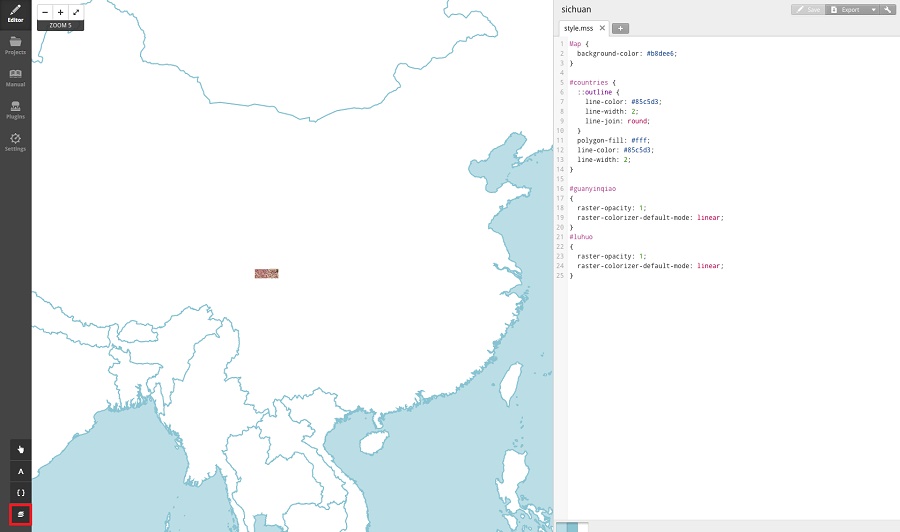 Figure 5. Importing maps into TileMill.
Rendering your maps
As the right side column of Fig 5 shows, you can edit the script that describe the render style of your maps. There is detailed documentation of TileMill tells you how to do it. Fell free to customize your geology maps.
Of course you can add other vector layers: roads, villages, the faults that you are studying, previous field trips' traces, previous sampling sites. The only limitation is your imagination.
It is better to collect geology maps with different scales of the same region, as 1:1,000,000, 1:500,000, 1:200,000, etc. In TileMill you can set different scale maps to appear in different zoom level ranges (If you are familiar with the comcept of raster pyramids in ArcGIS and zoom level of Google Maps). So you can control what kind of details will appear at different zoom level (scale).
Exporting your geology map service data
After you add all features that you wanted and are satisfied with your map, you can export your geology map service data and release your service now. Click Export\(\rightarrow\)MBTiles, then Fig 6 will appear, you can resize and drag the rectangle to set the extent of your export region, there are other parameters you can set: zoom range, Centor and MetaTile size, the export extent and zoom range will decide the size of your output file, so set them carefully, you wouldn't like to store a 20G MBTiles file in your iPad.
 Figure 6. Exporting geology map service data: MbTiles.
Using your geology map service on iPad
There are several Apps for iPad to view MBTiles file, MBTiles GPS is a free and simple one. It is still being developed, as shown in Fig 7A and 7B. Maybe too simple, fancy features like tracing and marking locations are not included. But it will satisfy your basic usage.
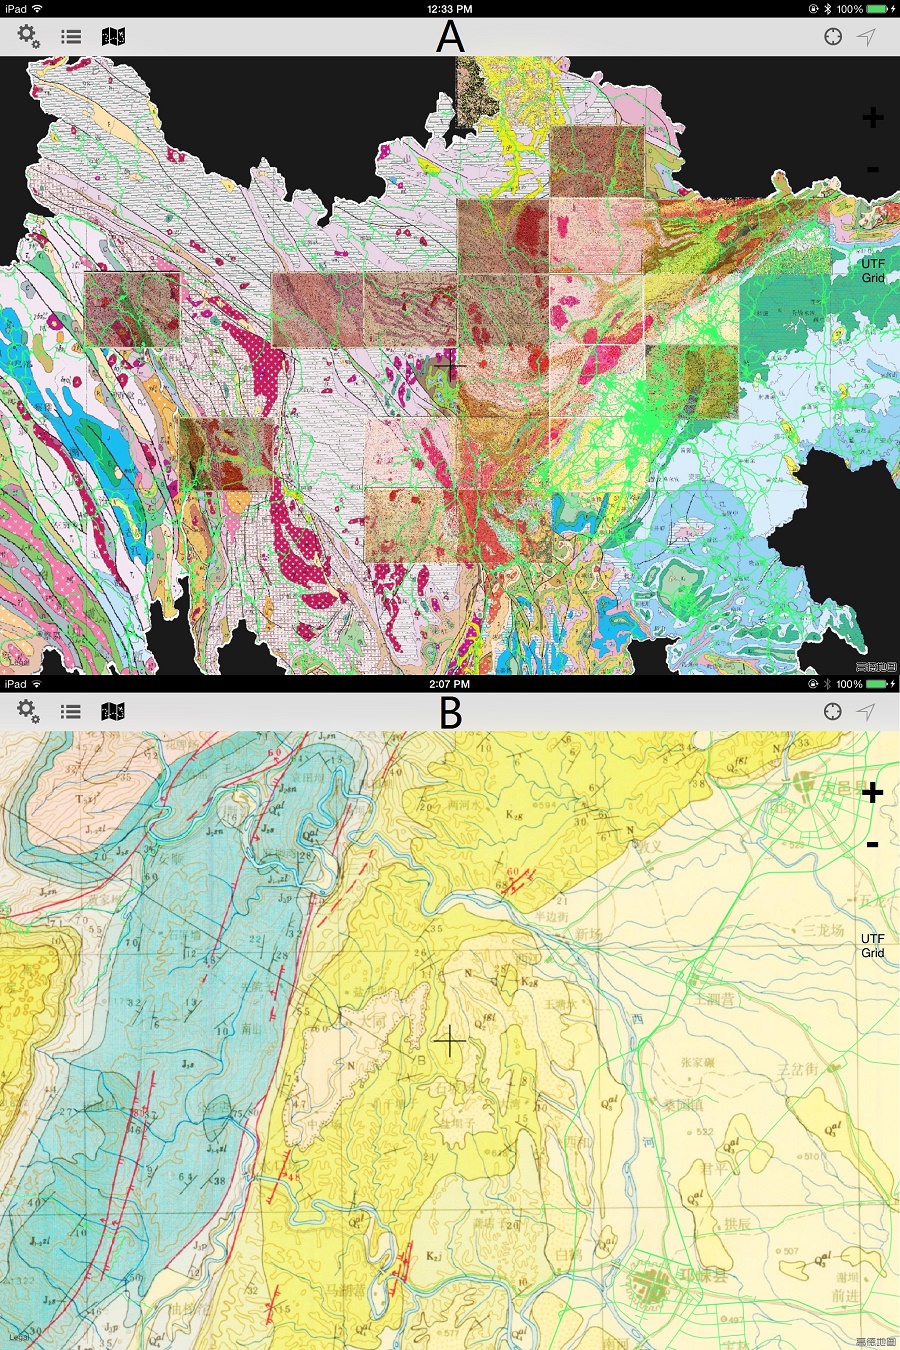 Figure 7. Using geology map service on iPad. A: Large scale view; B: Detailed view.
If you want to release your geology map services online, you may need Mapbox's service. They made it very simple and convenient for you.
If you want your geology map services to have fancy features, you may need to develop your own Apps. Again you can use Map App framework provided by Mapbox, both for iOS (Mapbox iOS SDK) and Android (Mapbox Android SDK).